How I use my Hobonichi Cousin planner
As I’ve mentioned in previous posts, I love planning in a paper planner to supplement my Notion planning. Last year I tried out a Passion Planner, which was a nice change and a lot of fun, but for many years I’ve been an avid Hobonichi Techo (and Weeks) user. I think paper planners are so much more fun to work in, easier to flip through, and better at keeping memories. I love to put stickers, washi tape, ticket stubs and all kinds of things in my planner. Looking through old Techos and rediscovering memories from both big, exciting trips and little everyday things is so fun.
I always told myself that if I ever went to graduate school, I would try out a Hobonichi Cousin (the largest size of Hobonichi planner), since I would finally have a use for all the space and pages. So, when I got accepted to my counseling psychology program for a January start, that’s exactly the planner I chose for 2021!
Let me show you how I use mine!
The outside cover is a stack of “Mister Saturns,” my favourite character from my favourite video game series (I’ve also used a clear “cover-on-cover” to keep the fabric cover pristine, since it’s a collector’s item and something I plan on using for multiple years). The creator of the Mother/Earthbound video game series, Shigesato Itoi, is also the creator of the Hobonichi website and planners. I love that so many Hobonichi products are Earthbound-themed!
“Only five can ladder.” “Potential!”
The cover (which is sold separately) has lots of little pockets to stick polaroids, bookmarks and whatever else inside. I love always having a little secretary scissor at hand, plus some stickers and random decorations in my cover. I also have a separate Midori cover on the cousin as extra protection in case I want to take it out of the Mister Saturn cover. (Yes, I have a problem, lol. But I like having options, and the covers are obviously reusable every year.)
There are spreads in the Hobonichi Cousin for anything you could possibly need or want. There’s a page showing an overview of the whole year, plus last year and next year, a spread that gives every day of the year a single line, then monthly, weekly, and daily pages. In the back there are some reference pages and blank pages, plus room for a few addresses and your information in case you lose your planner. There are plenty of YouTube videos walking you through the blank pages if you’re interested in seeing for yourself.
I love Lindsey Scribbles’ idea of using the year-at-a-glance/line-per-day spread as a “calendex,” or table of contents - if I note any reference material on a certain page in my daily spreads (say a recipe, or a list of what I need at Target next time I go), I can write a reminder to myself of what day it was written on in the calendex. I also colour-code the list so I can see things more easily.
My colour code throughout my planner is:
Yellow = personal
Orange = school
Pink = relationship
Blue = social
Green = therapy
Grey = reference/housekeeping/tedium
I love using Zebra mildliners and Tombow dual brush pens to do my colour-coding. But be careful when highlighting after writing! Make sure your pen is dry and mostly smudge-proof since Tomoe River paper is different than most other paper you might be used to.
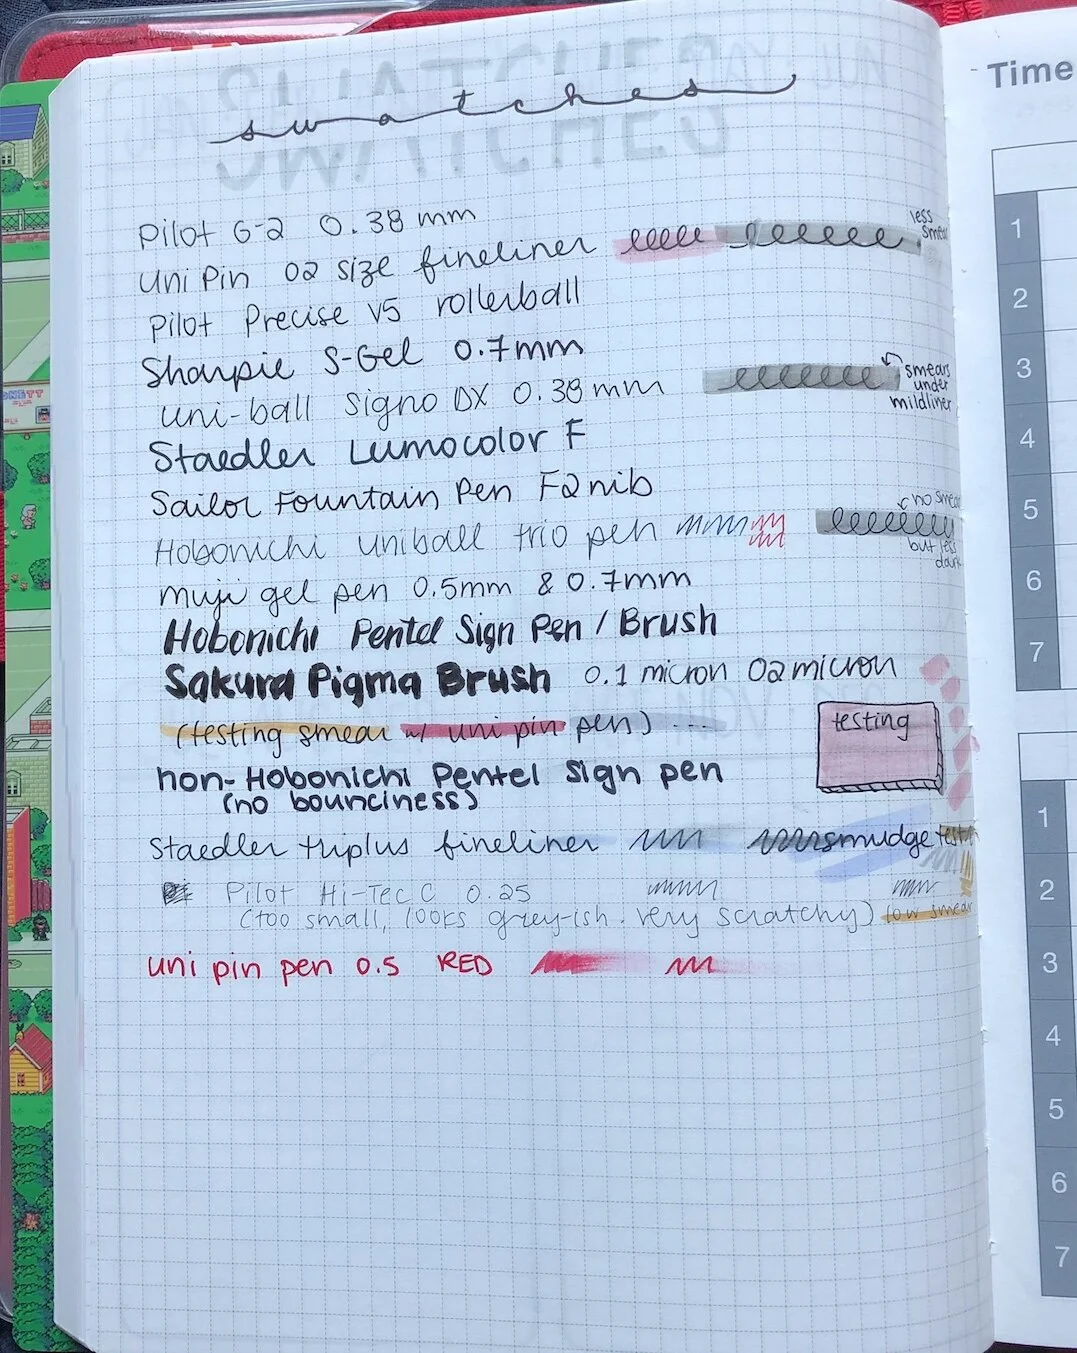
Speaking of being careful, in the back pages of my planner I keep a swatch list of all the pens, markers and highlighters I have in my collection and how they act on the Tomoe River paper. Right now my favourite pen for general writing in my planner is a 02/0.38mm Uni Pin pen. I also love using a 05/0.5mm Uni Pin pen in red for checking my check boxes… There is something so satisfying about using a big juicy red marker to check things off! :)
I also use a 0.38mm Uni-ball Signo DX/UM-151 gel pen to write sometimes, but not if I am planning to highlight over top, so usually this will be when I’m just writing about my day journal-style in the daily pages, or writing a list. Using this pen does indent the pages a little bit, but using a shitajiki/writing board under the pages helps mitigate that. I have about three shitajiki in my planner, one under my current monthly, weekly, and daily spread. They’re also great to stick into the front or back of your cover if you just want a little more stability but don’t mind indented pages. (Sometimes I think it’s nice to have that crispy, written-on page-feel, but it’s not for everyone.)
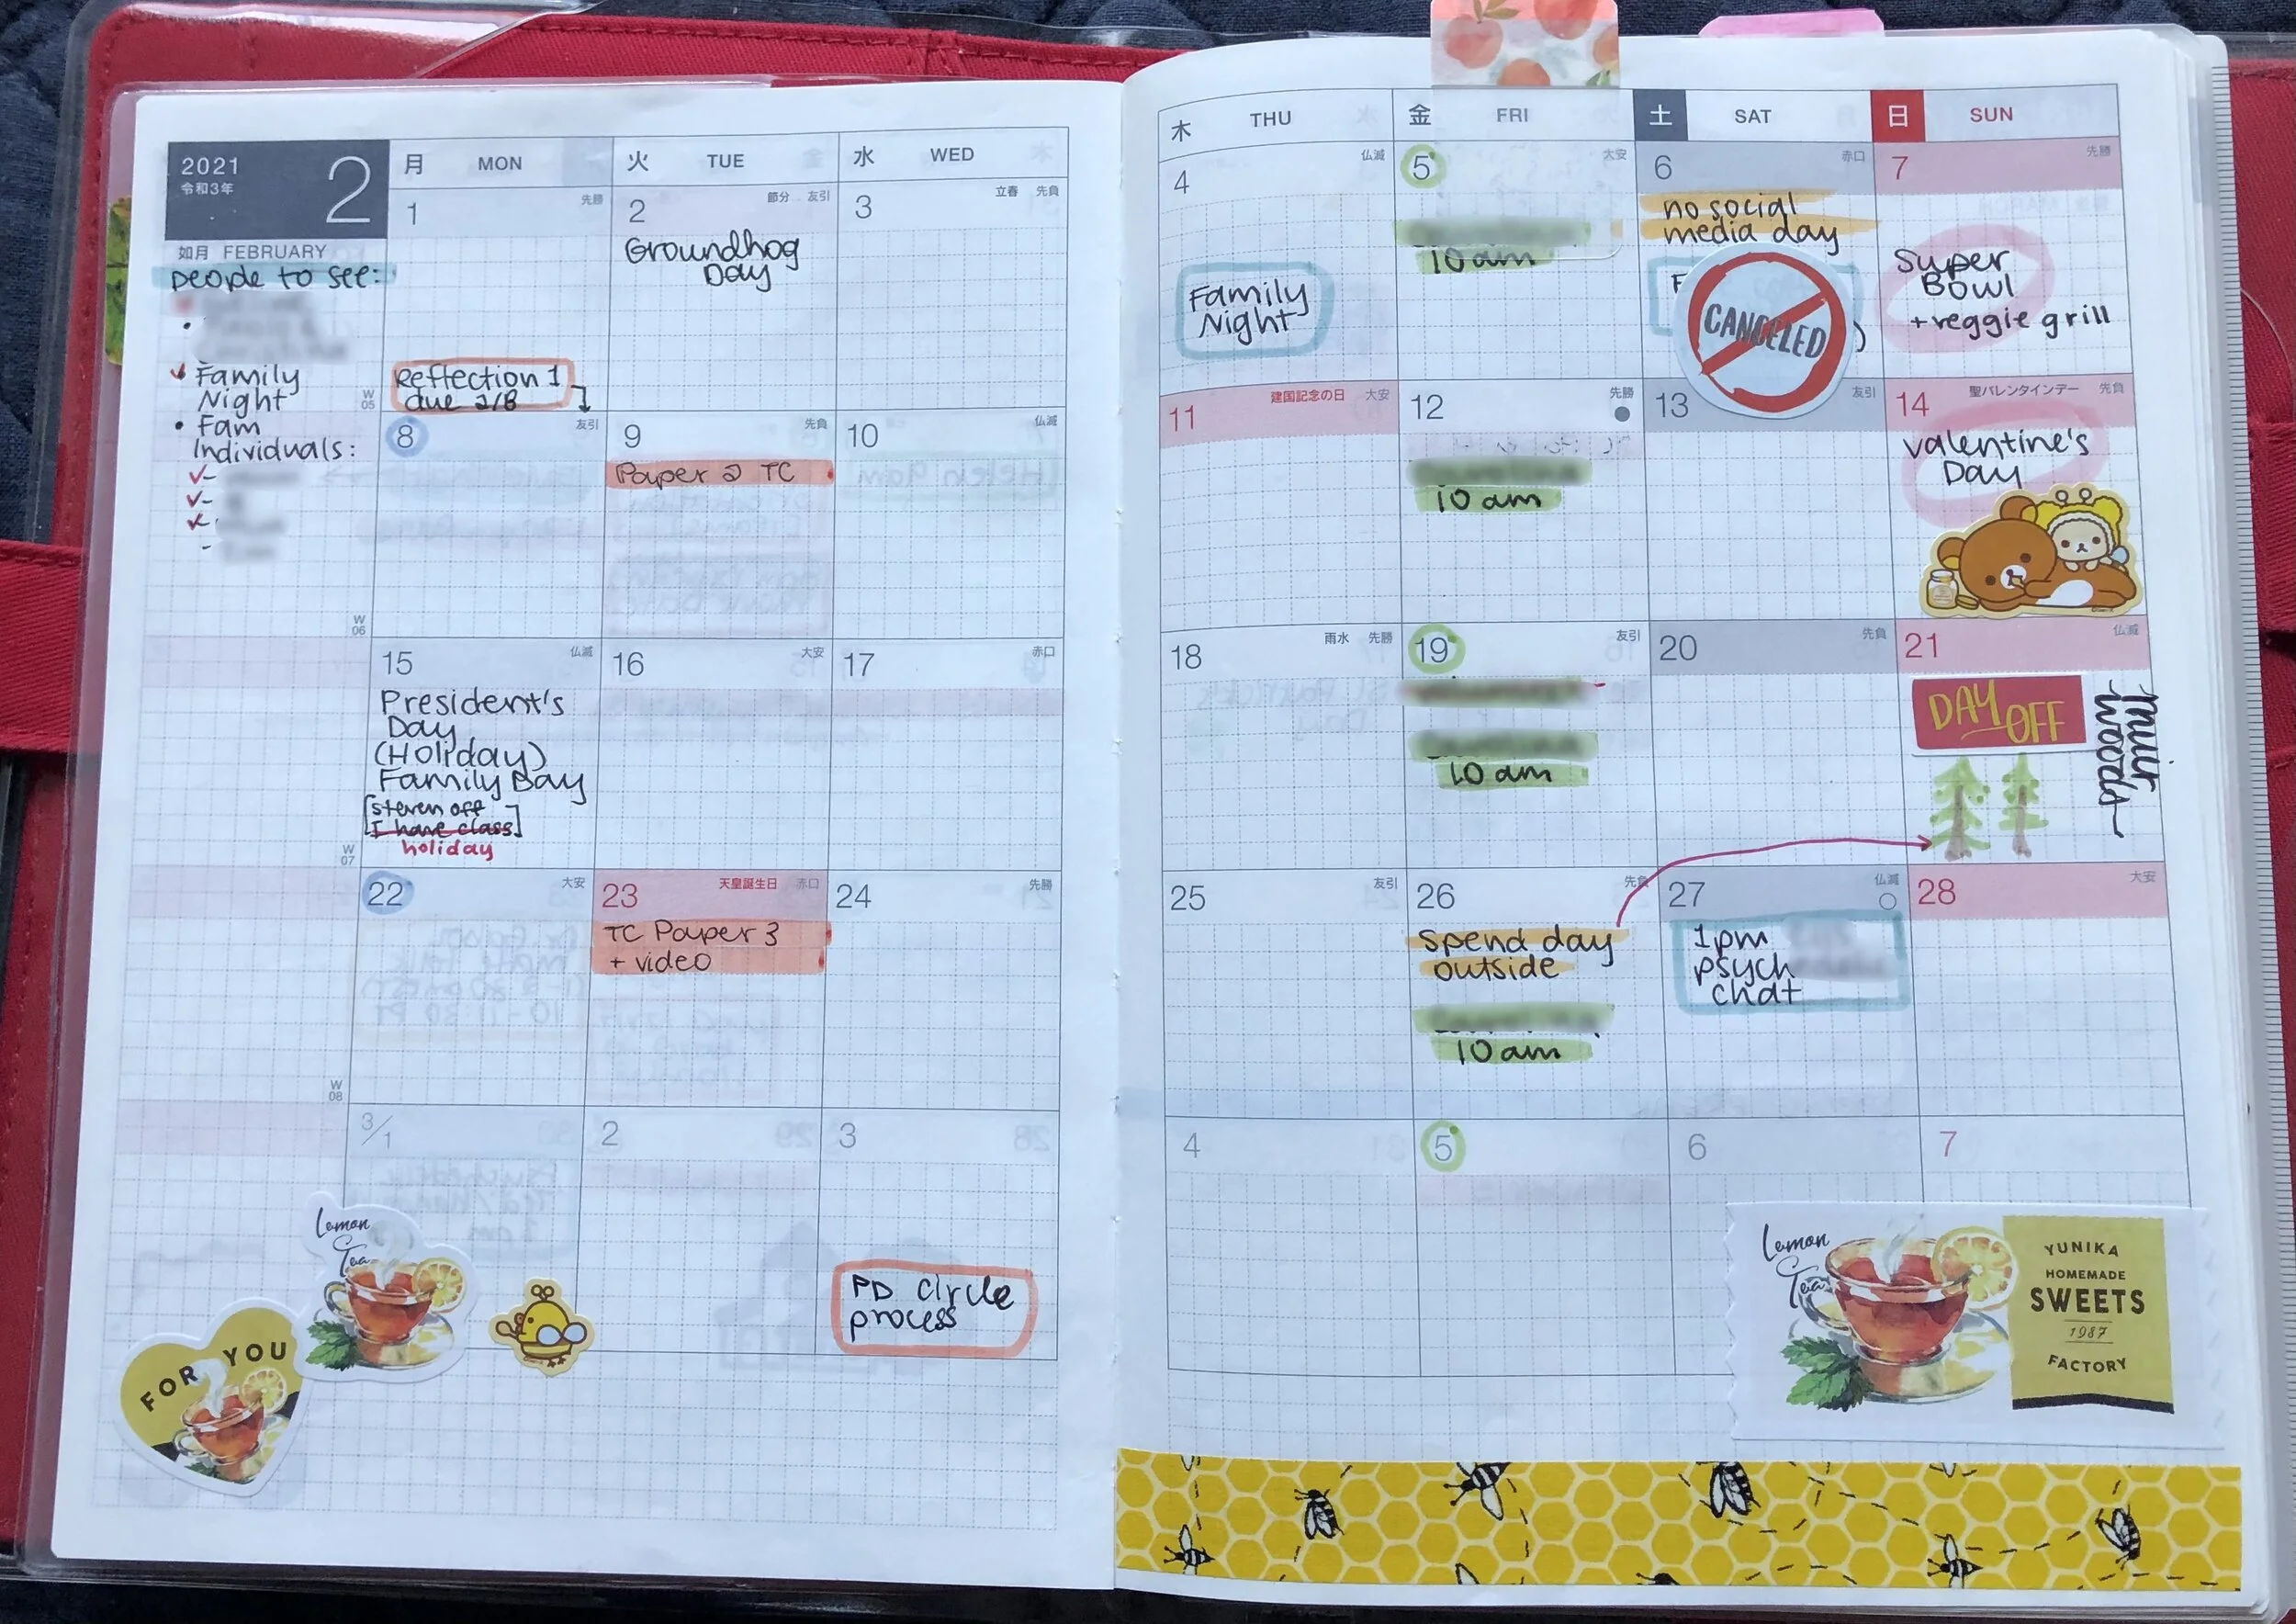
Below is an example of a monthly spread once it’s mostly filled-in. I’ll add important due dates, holidays, appointments, social events, etc. And, of course, try to decorate it cutely.
I like the Passion Planner pages which has space for lists. (This month’s focus, People to see, Places to go, Things to learn, Personal vs Work projects, and blank space to create lists or mindmaps) I’ve been trying to incorporate those things a little more in my own monthly spreads.
As I mentioned previously, I also like the idea of purposely planning certain things for fun into your schedule for each month, so I have a post-it note that travels from month to month that reminds me to try to schedule:
“Lunch” with a friend (a video chat, in covid-times)
24 hr No social media (I do love TikTok but it always feels good to turn off once in a while)
1 Day spent mostly outside (much easier in California than Ontario, I must admit)
1 “Night out” with friends (again, video chat)
1 Date night
1 Breakfast hangout
1 Movie night (I try to schedule some kind of event/movie with my fam 1-2x a month)
1 Day totally to yourself
1 Day of volunteering (I’ve been volunteering as a listener on 7cups occasionally when I have time, but if you choose to use that website please do keep in mind that since it’s 100% anonymous there are a fair share of trolls. You might get triggered as a listener, and it is not a substitute for therapy if you are a member.)
The weekly pages are where I spend most of my time in my planner.
Here’s an example of a (mostly) blank weekly page:
So much potential!
First I like to block off the big things coming up in my week like classes and appointments with highlighter boxes. I will also add a “Reading” checklist with the number of readings I have for each class, a “Due” box of what deadlines I have coming up, and finally a habit tracker near the bottom.
Keeping up with self-care is so important! Taking care of my body and mind is what allows me to work so hard when I need to. Rest and play are just as important as work. And sometimes self-care is the unglamorous stuff like remembering to floss and wash off makeup every day.
I’ve found out a couple of the things that make me feel my best when I do them every day, and when I finish them I get to check them off in that nice red marker I mentioned. Feels great!
Of course my planner never looks this blank for long. Let’s jazz it up a bit!
Here I added some cute stickers and washi stickers. I’ve found meal planning during my busy days is also immensely helpful, so lately I’ve been keeping track of a couple of ideas me and my husband can use throughout the week when we’re thinking of dinners.
After the day is done I also think it’s fun to add a couple highlights or random memories to look back on. Sometimes even just looking back on meals can be helpful so I remember what my favourites were and can look back on past days as inspiration. You can also never have too many stickers in my opinion.
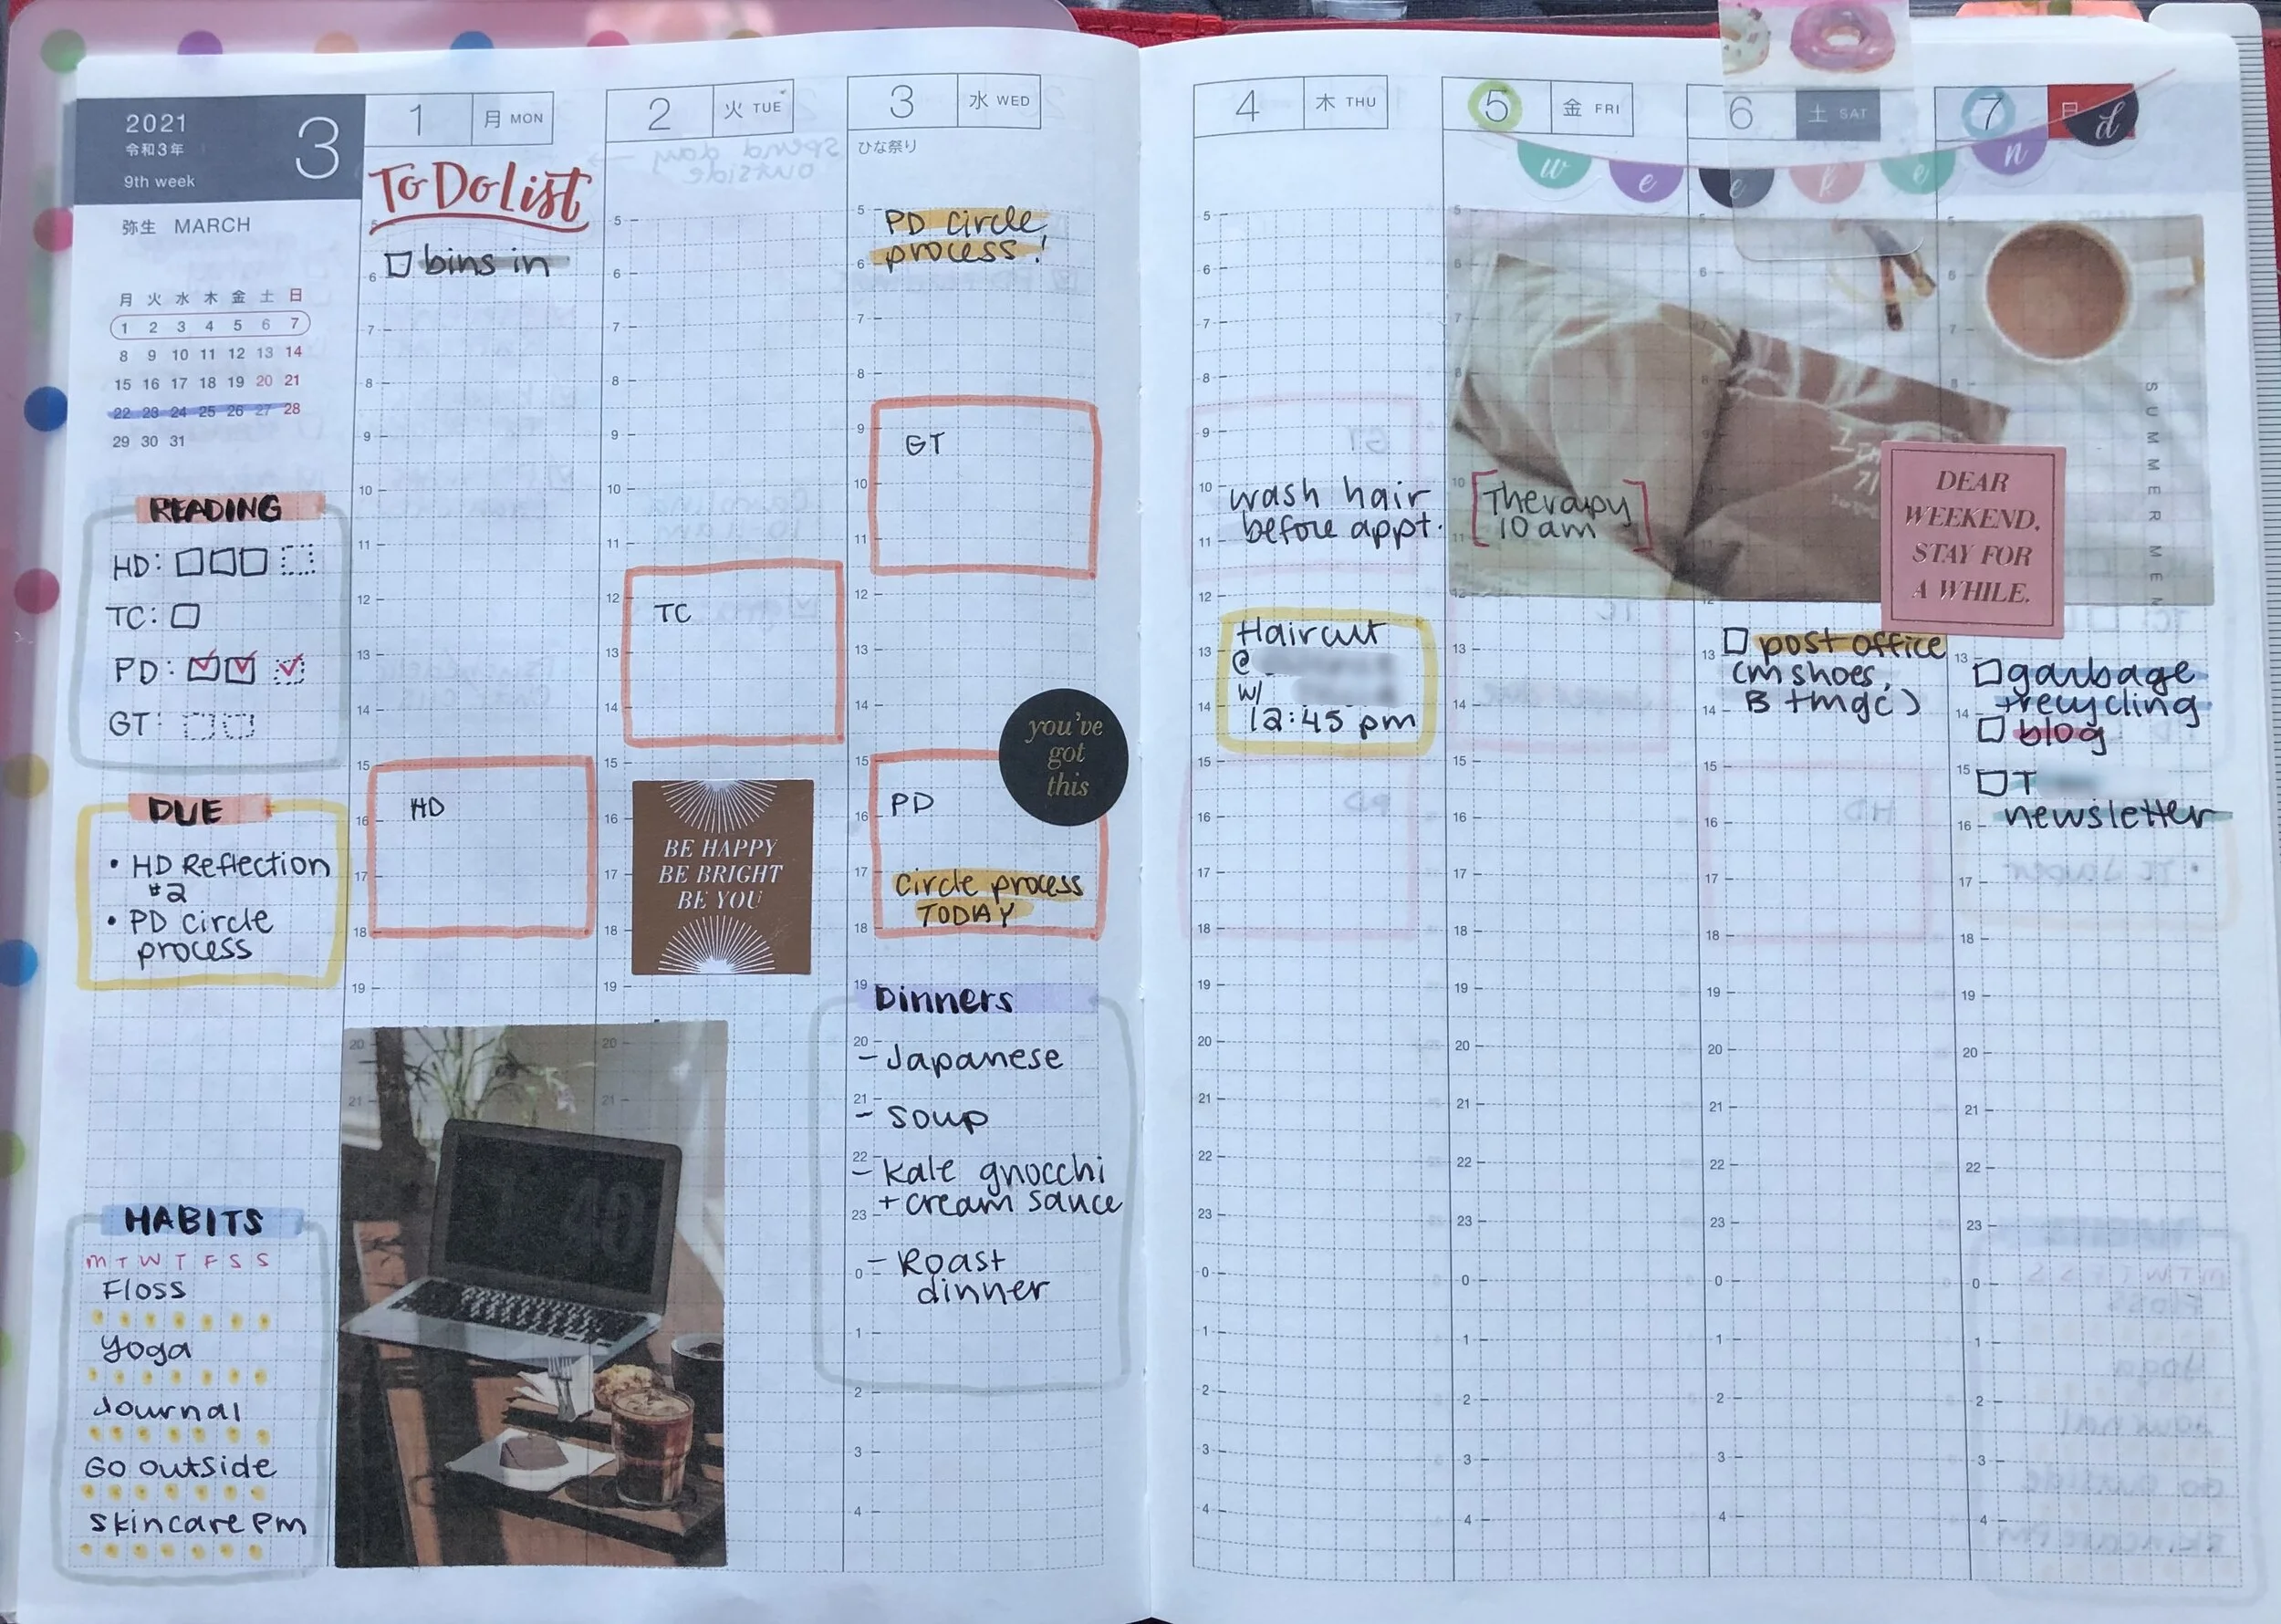
Here’s an example of a filled-in week:
There are also the daily pages that can be used for anything. Since you get a whole blank page for every single day of the year, you have space to get creative.
These pages are great for making extra to-do lists, brain-dumps, journal entries, writing down reference info, sticking ticket stubs, meal-planning, budgeting, doodling, painting, whatever you can think of! (Or all of the above.)
Here’s one of my daily pages below. I tend to make to-do lists running down the left side, using the ‘hidden line’ as a guide. This day I made a note of what I was eating, reading and doing.
The daily pages can be anything, so mine look different every single day. And blank pages are okay, too! I have plenty of my own. But I do like to write something when I have the time, since that’s more fun to look back on.
Among the daily pages, there are also blank pages for the start of each month. I liked having a monthly reflection in my Passion Planner last year, so I incorporated the same questions from that reflection into my blank monthly pages in my Hobonichi.
You can check out Passion Planner’s free downloads page for these questions and more ideas.
Those are the basics for how I use my planner! Having a huge stock of stickers, washi tapes and markers makes planning so much fun! I would totally recommend getting a Hobonichi Cousin for planning during graduate school.
I love that I’m able to flip through my pages and see all my upcoming due dates easily. There’s something about flipping back and forth in real pages that feels so much more satisfying than a digital planner or calendar app. For whatever reason, it just works better for my brain to be able to see, hold, and write my schedule with my own two hands.
For me, the Hobonichi Cousin is the ultimate planner because of the monthly, weekly, and daily spreads. It has everything you could need and more. I know that I write everything I could possibly need to remember in there, which gives me peace of mind. My planner is basically my second brain so I never have to worry about forgetting things. I find myself referencing it every single day. I love checking my little boxes. I love using my sticker and washi collection and having space for braindumps on busy days. I also quite often flip to my addresses page to dash off a quick letter, postcard or package to a friend, especially now that I live in a new country. I’m definitely going to continue to use my Cousin throughout the next couple of years of graduate school.
I hope you can find a planner system you like too!


